STEP BY STEP INSTALLATION GUIDE

|
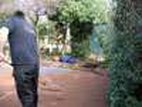
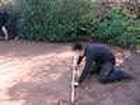
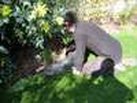
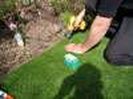
STEP 1 Assess the lawn that needs replacing, check levels of beds, fences, containing walls as you may need to excavate or build up the area. |

|
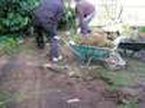
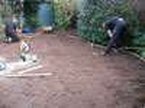
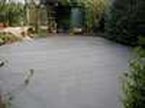
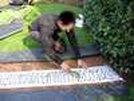
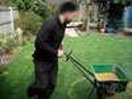
STEP 2 The lawn can be removed by either a mechanical turf cutter or by hand with shovels. The area needs to be cleared to a two inch depth. STEP 3 A 2 x 2 tanalised timber frame should be staked and secured with screws. STEP 4 The membrane should be placed over the top of the soil to prevent any weeds growing up through the sharp sand. STEP 5 Sharp sand should then be applied to the area and levelled out over the area to a 2 inch depth. The sharp sand can then be wacker plated in to prevent settlement. STEP 6 The area should be screeded level and neatly finished around the edges. The basework is now complete and is ready for the installation of the turf. STEP 7 Roll out the turf and mark the latex where it needs to be cut to the top of the timber. Fold the latex back over and carefully cut along the marked line using a sharp bladed knife. Fold the turf back over to give you a neatly finished edge. If a joint is not required go straight to Step 10 STEP 8 If a joint is required lay the two pieces of turf out on the area so they are ready to be butted up next to each other. Carefully cut along the rib at the back of the turf, as close as you can get to the rib without cutting into it, repeat this procedure for the other piece of turf. This can be done using a sharp bladed knife. STEP 9 Fold back both pieces of turf, lay the adhesive strip along the whole length of the joint, rough side up. Evenly apply the Aquabond adhesive to the tape and spread out using a trowel. It is advisable to wear gloves when completing this. Fold the turf back over onto the tape making sure that the ribs don't overlap each other or the gap in between them isn't any wider than 50mm. The joint is then rolled in to make sure the latex backing is in full contact with the adhesive. STEP 10 Once the carpet has been completely cut into shape using the technique shown in Step 7 the carpet should then be screwed to the top of the timber at 300mm intervals using 25mm self tapper screws. Neatly trim off any excess with scissors if required. STEP 11 If using a sand in-fill product evenly spread kiln dried sand over the area at a rate of approximately 10kg per square metre and brush the sand into the turf with a stiff brush. COMPLETION |
